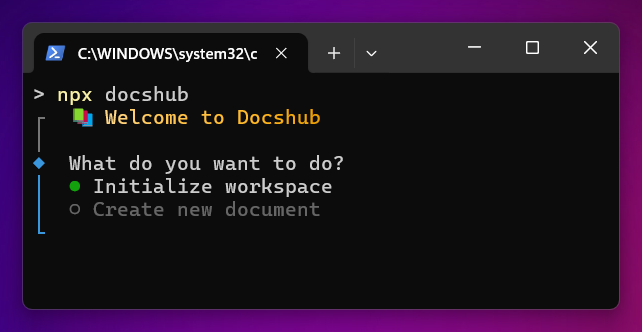
To run the CLI, it is necessary to have Node.js version 20 or higher.
DocsHub CLI is your all-in-one assistant for initializing DocsHub, creating new documentation, launching the application, and everything you need to build amazing documentation 📚.

Run CLI
npx docshubWhen we run the command without any arguments, we get a command-line interface with a set of options and functionalities that we can execute.
New workspace
You can use the CLI to initialize the workspace in two ways:
- By running
npx docshuband selecting “Initialize workspace”. - Or by running
npx docshub initdirectly.
Regardless of the option you choose, the CLI will generate a directory and file structure in your project, including the following elements:
.
├── 📂 docs/
   └── 📄 getting-started.mdx
├── 📂 images/
├── 📄 docker-compose.yml
└── 📄 .env
Now that we have the /docs and /images directories, the docker-compose.yml file, the getting-started.mdx template, and the default .env file generated. How can we start our application to edit the documentation or deploy it to production? For more details, please refer to the docker documentation:
This docker-compose.yml file documents the execution modes of DocsHub, which you can explore in more detail in the specific docker documentation:
Additionally, you can learn about the parameters and configuration accepted by the generated .env file through its documentation.
Create new document
To generate new .mdx documents inside the /docs folder, you can use the CLI in two ways:
- Run
npx docshub, select “Create new document”, and fill in all the fields. - Or run
npx docshub createdirectly, and fill in all the fields.
This functionality generates a new document with the parameters entered in the header. However, to see which parameters are available, refer to the following documentation:
Create documentation How to create new documentation fileAlternatively, if you want to explore the components and features available for use in your documents, you can refer to the relevant documentation:
Run interactive mode
This option allows you to run the DocsHub application in interactive mode or edit mode. It sets up a containerized development environment with zero configuration (with docker), enabling you to edit and view changes in your documentation. You can perform this action in two ways:
- You can do this either by running
npx docshuband selecting the “Run interactive mode” option. - Or by directly executing
npx docshub interactive.
The application should be available at http://localhost:4321.
Run standard mode
This option allows you to run the DocsHub application in standard mode or production. This will start your site in production mode with the content you have previously edited. You can perform this action in two ways:
- You can do this either by running
npx docshuband selecting the “Run standard mode” option. - Or by directly executing
npx docshub standard.
Remember that, the interactive mode starts by default on port 4321. This aligns with the established standard mode and ensures that the port used by Docshub is not in use before executing the command.
The application should be available at http://localhost:4321.
About and Help
-
The About option can be accessed by running
npx docshuband selecting the “About” option, or by executingnpx docshub aboutdirectly. This option provides detailed information about the version of the CLI you are currently running, including key features and version details. -
The Help option is available by running
npx docshuband selecting the “Need help?” option, or by executingnpx docshub helpdirectly. This option provides you with information about the available commands and their usage within the CLI, helping you understand how to interact with the tool.